

Set up your API key
Module 2. Your goal: Connect ComfyUI to BytePlus ModelArk and save your first generated image. An API key lets the node pack send requests using your BytePlus account.
Before you start
Section titled “Before you start”- Complete Module 1.
- Have a BytePlus account with available balance and access to ModelArk.
- Prepare a reference image you have permission to use, or download the practice logo below.
This course uses only the ModelArk API key. You do not need Seed Speech, MediaKit, LAS or IAM keys.
Download the practice logo (PNG). Save it in your course folder, even if the same filename already appears in a template. It comes from Comfy Org’s workflow templates, with its MIT license notice.

Create your ModelArk key
Section titled “Create your ModelArk key”- Sign in to BytePlus and open ModelArk. Use the region your account administrator has enabled for this project. If you are setting up your own account, start with Singapore and check model access there.
- Open API keys in the ModelArk console. The Singapore API-key page is a direct starting point if you use that region.
- Create an API key and copy it privately. Do not put it in your course notes or workflow.
- In ModelArk’s model catalog, search for Seedream 5.0 Pro and Seedance 2.5. Open their details and follow any activation or access instructions shown for your account. Seeing a model in ComfyUI’s dropdown does not confirm account access.
Keep the region unchanged while creating the key. A saved key is one checkpoint; a successful image run below confirms image access. Seedance access is checked when you run the draft in Module 5.
Save the key in ComfyUI
Section titled “Save the key in ComfyUI”- Open Settings > BytePlus > Default credentials.
- Find ModelArk API key and paste your key.
- Select the matching region:
ap-southeast-1for Singapore oreu-west-1for Europe, according to where you created the key. - Press Save. Confirm that Settings shows the key as set. It takes effect without restarting ComfyUI.
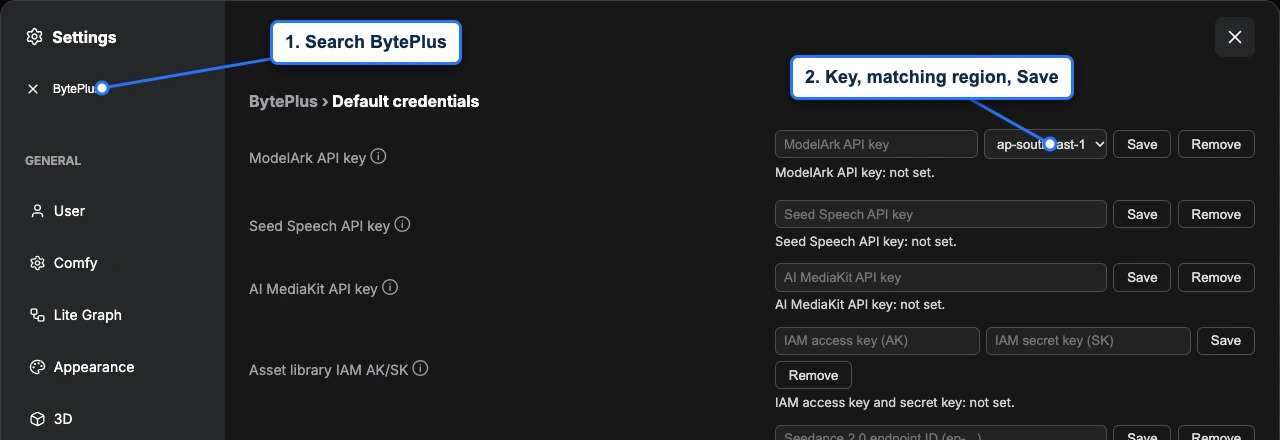
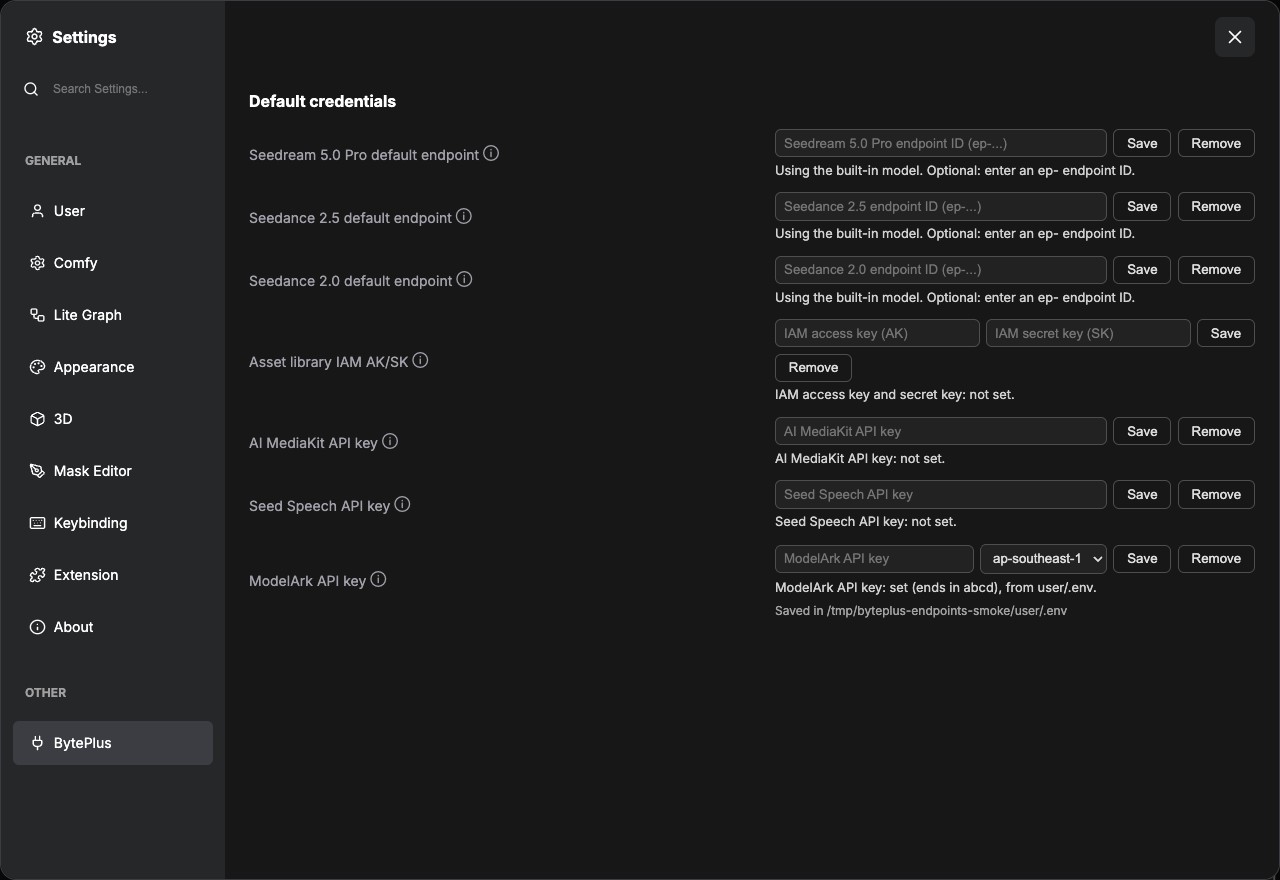
Leave optional model endpoints empty unless your account administrator has supplied a matching endpoint. The API-key reference explains those account-specific settings.
Generate your first image
Section titled “Generate your first image”The Seedream template is included with the node pack and provides the connected graph.
- Template
- Seedream, in the ComfyUI template browser under BytePlus
- BytePlus nodes
- Seedream 4.5 & 5.0
- Keys needed
- ModelArk API key
- Also uses
- Load Image, Save Image (built into ComfyUI)
- Open Templates in the left sidebar, look under ComfyUI-BytePlus-ModelArk, and open Seedream.
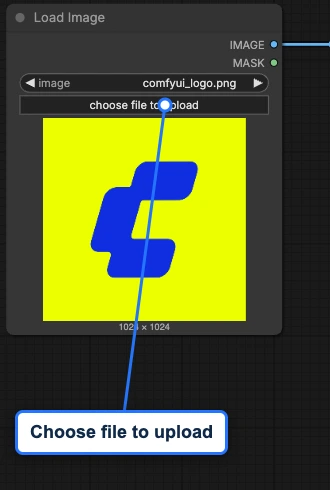
- In Load Image, press choose file to upload and select the practice logo or your reference image. Confirm a preview appears.
- Keep
seedream 5.0 proselected. For the logo, use the template’s prompt. For your own image, describe the result you want. Set Save Image’sfilename_prefixtoCourse/first-image. - Press Run and wait for the result to appear in Save Image.
- In ComfyUI’s file location, open
output, thenCourse. Find the file beginningfirst-image. Copy that image into your course folder.
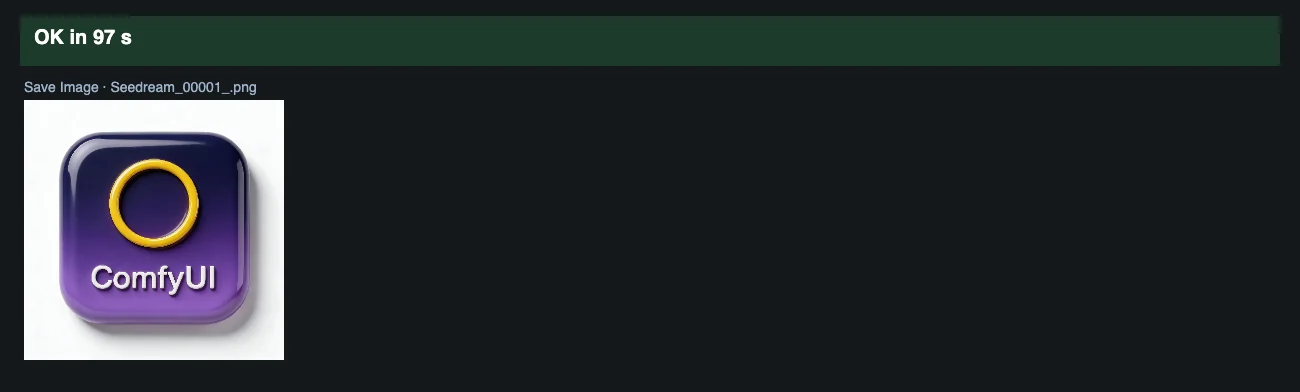
For Desktop, use the ComfyUI file location you chose during installation. For a manual installation, output is in the ComfyUI directory. If ComfyUI runs on another computer, the output folder is on that computer.
The key is stored separately from your workflow. Keep it out of screenshots, recordings and shared files. Generation sends your reference and prompt to the cloud and uses your BytePlus account balance.
Practice
Section titled “Practice”Write one sentence naming the product, audience and desired look. For example: “Create a clean studio image of my reusable bottle for an online shop, with soft shadows and space for advertising copy.” Keep it with a photo you own or have permission to use. Use this same brief and original reference throughout Modules 3-5.
Without a product photo, keep using the practice logo and this brief: “Create a glossy ComfyUI logo badge for a creator profile, on white with soft shadows and space for a headline.” In later product prompts, replace “product” with “logo badge”.
Completion check
Section titled “Completion check”- Settings shows your ModelArk key as set with its matching region.
- A generated image appears in Save Image and in
output. - You have a product brief and reference ready for the next lesson.
- Your saved course files contain no API key.
Next lesson
Section titled “Next lesson”Module 3: Understand and build a workflow.
Previous: Module 1: Install ComfyUI.