

Build your first workflow
Module 3. Your goal: Build a three-node image workflow and explain how the image moves through it. You will create an image with Seedream, save the result and keep a workflow you can reuse.
Before you start
Section titled “Before you start”- Complete Module 1 and Module 2.
- Confirm access to Seedream 5.0 Pro in your key’s region.
- Have the successful first image and product brief from Module 2.
- Use the practice logo for the walkthrough, or upload a reference image you have permission to use.
Download the practice logo (PNG). Keep this reference file with your workflow; it is not included inside the JSON.

Keep your key in Settings > BytePlus. Never put it in a prompt, workflow or screenshot. Running generation uses your BytePlus account balance.
What you will build
Section titled “What you will build”Load Image -> Seedream -> Save Image
A node performs one step. A connection passes data between nodes. A workflow is the connected graph, including its settings.
- Load Image supplies your reference through its
IMAGEoutput. - BytePlus Seedream combines that reference with your prompt and generates an image.
- Save Image receives the generated image and writes it to ComfyUI’s
outputfolder.
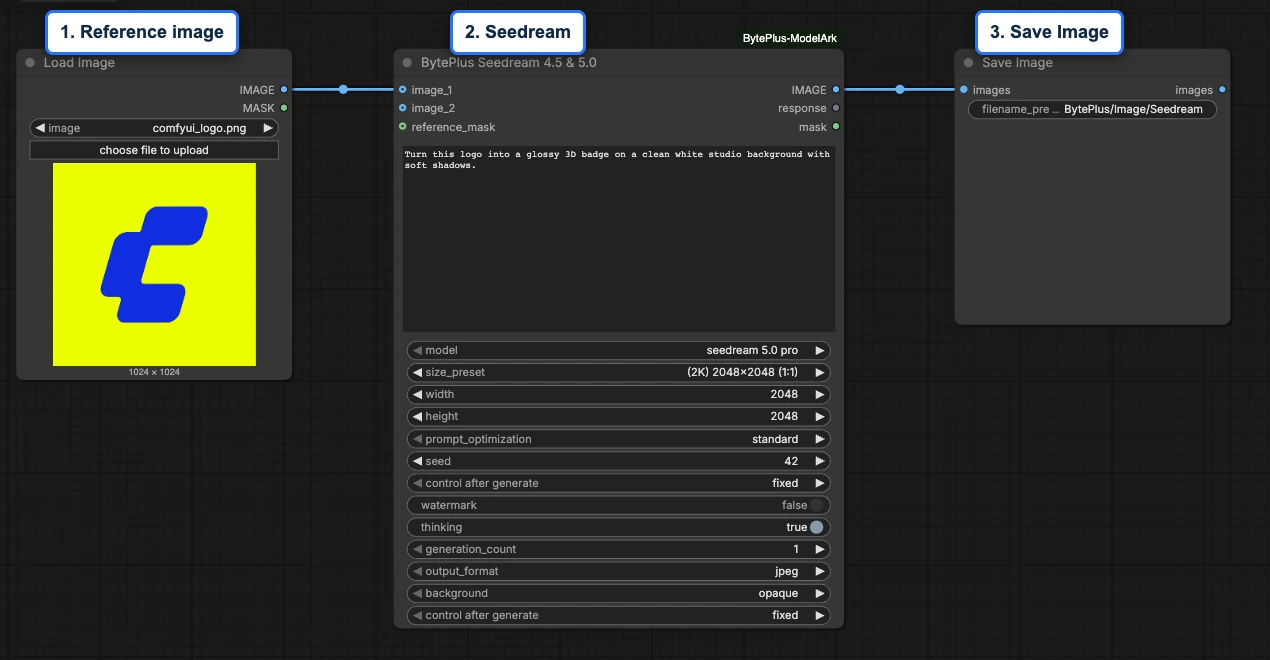
The screenshot may show a model-version label in the node title. Search for BytePlus Seedream in the current pack.
The included Seedream template is your worked example. Open it from Templates > ComfyUI-BytePlus-ModelArk if you want to compare the connections. For this lesson, build the graph yourself.
- Template
- Seedream, in the ComfyUI template browser under BytePlus
- BytePlus nodes
- Seedream 4.5 & 5.0
- Keys needed
- ModelArk API key
- Also uses
- Load Image, Save Image (built into ComfyUI)
Build the workflow
Section titled “Build the workflow”- Press + beside the workflow tabs to start a blank workflow.
- Open Nodes in the left sidebar. Search for Load Image, then drag its result onto the canvas. Repeat for BytePlus Seedream from the BytePlus ModelArk category, and Save Image.
- Move each node by dragging its title bar. Arrange Load Image, Seedream and Save Image from left to right.
- In Seedream, choose
seedream 5.0 pro. Press and hold the smallIMAGEcircle on the right of Load Image, drag to Seedream’simage_1circle on the left, then release. A line should remain. - Drag Seedream’s
IMAGEcircle on the right to Save Image’simagescircle on the left. LeaveMASK,maskandresponseunconnected. - In Load Image, press choose file to upload and select the downloaded logo or your reference. Confirm a preview appears.
- Select
(2K) 2048x2048 (1:1)forsize_preset. For the logo example, paste the prompt below into Seedream. Keep other model settings at their defaults.
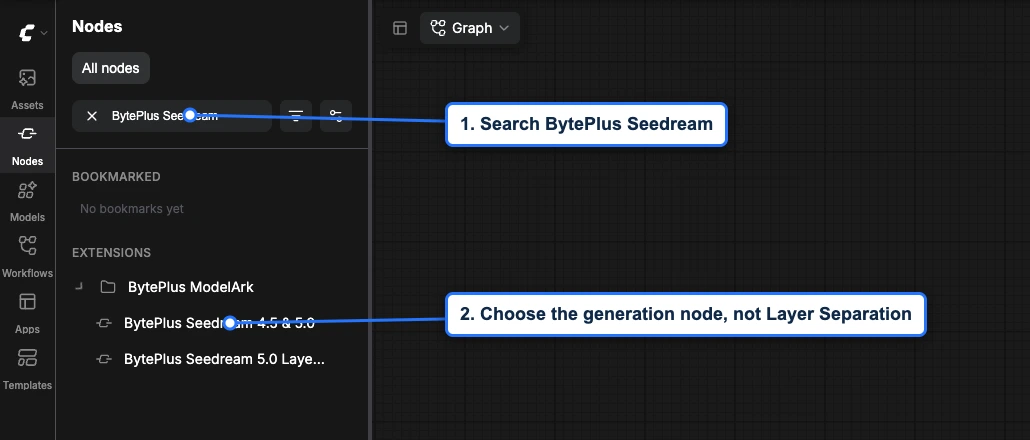

If labels are too small, zoom in on the canvas. Inputs may show a prefix such as model.images.image_1; use the first reference image socket ending in image_1.
Turn this logo into a glossy 3D badge on a clean white studio background with soft shadows.For your own reference, replace “this logo” with the subject and describe what you want to keep and change.
Before running, trace the graph: the reference enters Seedream, the prompt describes the change, and the generated image goes to Save Image. Image sockets connect to image sockets; the text response output is not an image.
Run and review
Section titled “Run and review”- Press Run and wait for the Seedream node to finish.
- Review the image displayed in Save Image. For the logo prompt, look for a 3D badge, a white background and soft shadows.
- Find the saved image in ComfyUI’s
outputfolder. The Save Imagefilename_prefixcontrols its name and subfolder:Course/product-imagesaves inoutput/Course, with filenames beginningproduct-image. ComfyUI adds a counter and file extension.
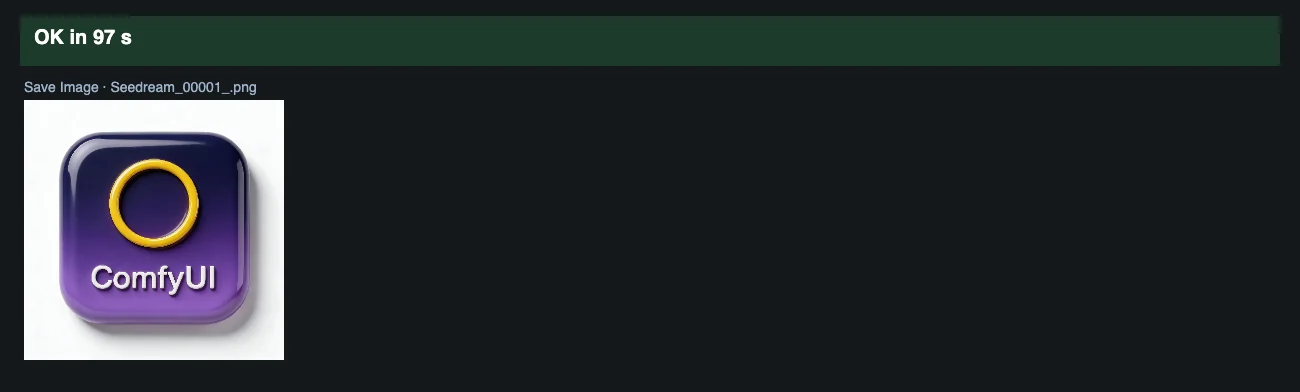
The generation node does not save images itself. Save Image both keeps the result and gives the graph an output to execute.
Copy the generated image to your course folder. The output folder is inside the ComfyUI file location from Module 1, not inside the folder where your browser downloads JSON.
Save and reopen
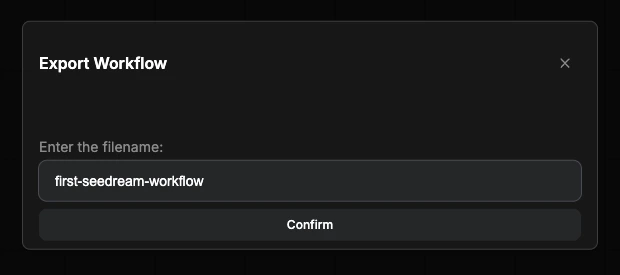
Section titled “Save and reopen”- Open Graph in the top toolbar and choose Export, not Export (API).
- Enter
first-seedream-workflowand press Confirm. Locate the downloadedfirst-seedream-workflow.jsonin your browser’s download location and move it to your course folder. - Press + to open a blank workflow, then drag the saved JSON onto the canvas.
- Confirm the three nodes, two connections and prompt are restored. Reselect or upload the reference image if it is not available on this machine.
- Run the reopened image workflow and confirm an image appears in Save Image.
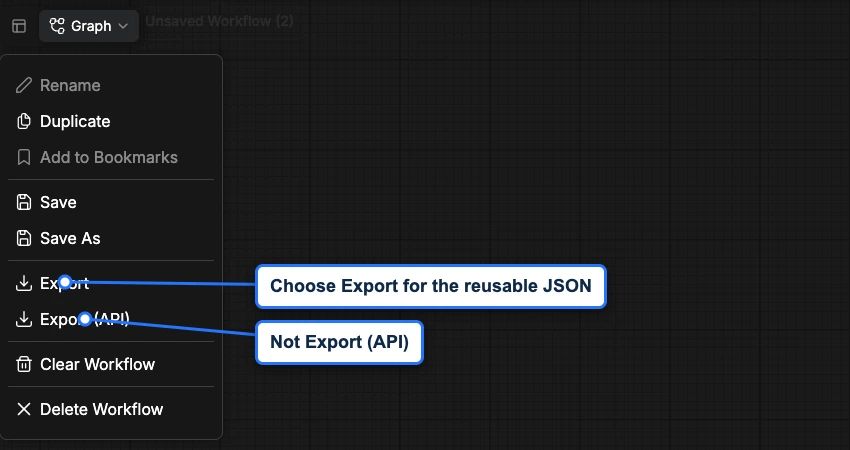
The JSON stores the graph and settings, not the reference image file. Keep that image with your workflow when sharing. The recipient also needs ComfyUI, this node pack, model access and their own ModelArk API key.
You have now reopened your own saved workflow. Keep this export so you can reuse and share the graph you built.
Practice
Section titled “Practice”Adapt the graph using the original product reference and brief you prepared in Module 2. Replace the reference and prompt; do not create another brief yet. If you chose the logo-badge practice, use that subject instead.
Try this starting prompt:
Keep the product's shape, colour and label from the reference. Place it on a clean white studio background with soft shadows. Do not add extra text or objects.Review the result against the brief and note any unwanted changes to the product or label. Save the image and workflow, then explain what each node contributes.
Completion check
Section titled “Completion check”- You built the graph yourself and can trace both image connections.
- You can identify where to change the reference image and prompt.
- A generated image appears in Save Image and is saved in
output. - Your workflow JSON reopens with the same graph and settings.
- Your shared materials include the reference image but no credentials.
Next lesson
Section titled “Next lesson”Module 4: Create and refine product images.
Previous: Module 2: Set up your API key.
Return to the course learning path.