

Tutorials
Build reusable AI workflows, one node at a time. These beginner tutorials teach you to connect ByteDance models in ComfyUI through BytePlus ModelArk. No coding experience is required.
Start with installation and API keys, build an image workflow, then turn a selected image into a Seedance 2.5 480p draft and 1080p final.
Before you start
Section titled “Before you start”- Have a computer supported by ComfyUI, with internet access. Installation is covered in Module 1.
- Have a BytePlus account with available balance and access to ModelArk.
- Prepare a reference image you have permission to use.
Save your ModelArk API key in Settings > BytePlus, not in a workflow. Generations use your BytePlus account balance and send your inputs to the cloud; avoid confidential material.
Start learning
Section titled “Start learning”Follow all six lessons in order. Skip to Module 3: Understand and build a workflow only if you already have BytePlus nodes installed, a working ModelArk key, one saved Seedream image, and a reference image with a one-sentence brief. Otherwise, complete Modules 1 and 2 first.
How to use the lessons
Section titled “How to use the lessons”Keep the lesson open beside ComfyUI. Follow one numbered step, then compare your screen with the nearby image. Click or tap any screenshot to enlarge it; use the viewer’s zoom controls for small labels.
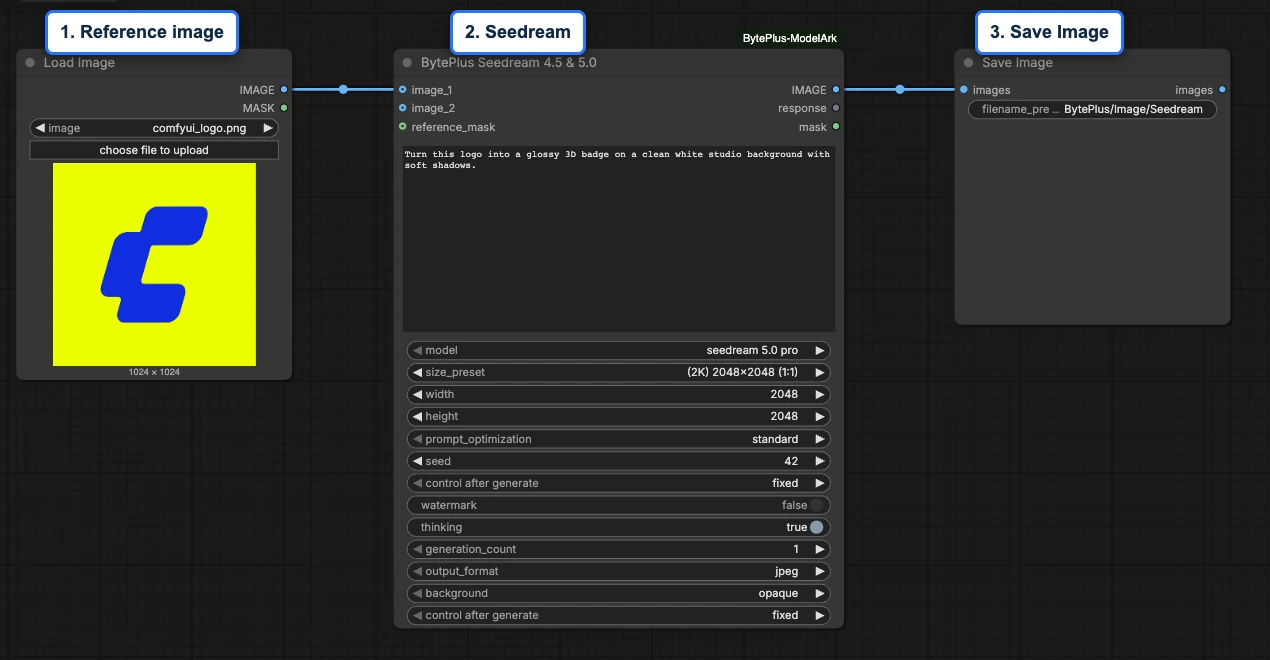
Learning path
Section titled “Learning path”Use one product brief as you work through Modules 2-5. State the product, audience and desired look. First follow an example, then rebuild and refine its workflow.
| Module | Material | Completion check |
|---|---|---|
| 1. Install ComfyUI | Installation lesson | Find BytePlus nodes and templates. |
| 2. Set up your API key | API-key lesson | Generate and save one image. |
| 3. Understand and build a workflow | Build your first workflow | Build, save, reopen and explain your graph. |
| 4. Create and refine product images | Image-refinement lesson | Compare two variations against your brief. |
| 5. Turn an image into video | 480p draft to 1080p final lesson | Review a 480p draft and render its 1080p final. |
| 6. Final project | Independent project | Adapt the workflow to a new brief and explain your choices. |
Each lesson includes instructions, practice and a completion check. Keep your reference images, outputs, workflow JSON files and selection notes together.
The screenshots show one ComfyUI layout. Your version may place tools differently; follow the named controls and node labels.
Use the included templates
Section titled “Use the included templates”The Seedream and Image to Draft to 1080p workflows are included with the node pack installed from Comfy Registry. Open Templates in ComfyUI and look under ComfyUI-BytePlus-ModelArk.
In Module 3, you build your own graph, export it and reopen that saved workflow. Keep these exports so you can reuse and share your work.
Reference images are separate from workflow JSON files. Use an image you have permission to use, or download the practice logo in Module 2. The template’s filename alone does not supply the image.
Course scope
Section titled “Course scope”Product visuals are the practice example; the workflow skills apply to other creative projects. Local-model setup, model training and advanced filmmaking are outside this beginner course.
In the final project, you submit a product image, a reviewed draft, its final video and reusable workflows. Assess product details, composition and motion against your new brief, and note visible errors.
Tutorials and reference guides
Section titled “Tutorials and reference guides”Tutorials teach a skill through guided practice. Node pages explain individual inputs and outputs; template pages describe ready-made workflows. Use them together as you build.