

Install ComfyUI
Module 1. Your goal: Open ComfyUI with the BytePlus nodes ready to use. You do not need to download local image or video models for this course; Seedream and Seedance run through BytePlus ModelArk.
Before you start
Section titled “Before you start”- Use a computer supported by ComfyUI, with internet access and permission to install applications.
- Choose a folder for your course reference images, workflows and results.
- If ComfyUI is already installed, go straight to installing the BytePlus pack below.
ComfyUI must still meet its own installation requirements, even though generation happens in the cloud.
Install and launch ComfyUI
Section titled “Install and launch ComfyUI”- Choose the official guide for your computer: Windows Desktop, macOS Desktop or Linux Desktop. Check the guide’s hardware requirements before downloading.
- Download the installer from the official ComfyUI download page. Install the application and follow its initial setup, including choosing the folder for ComfyUI’s files.
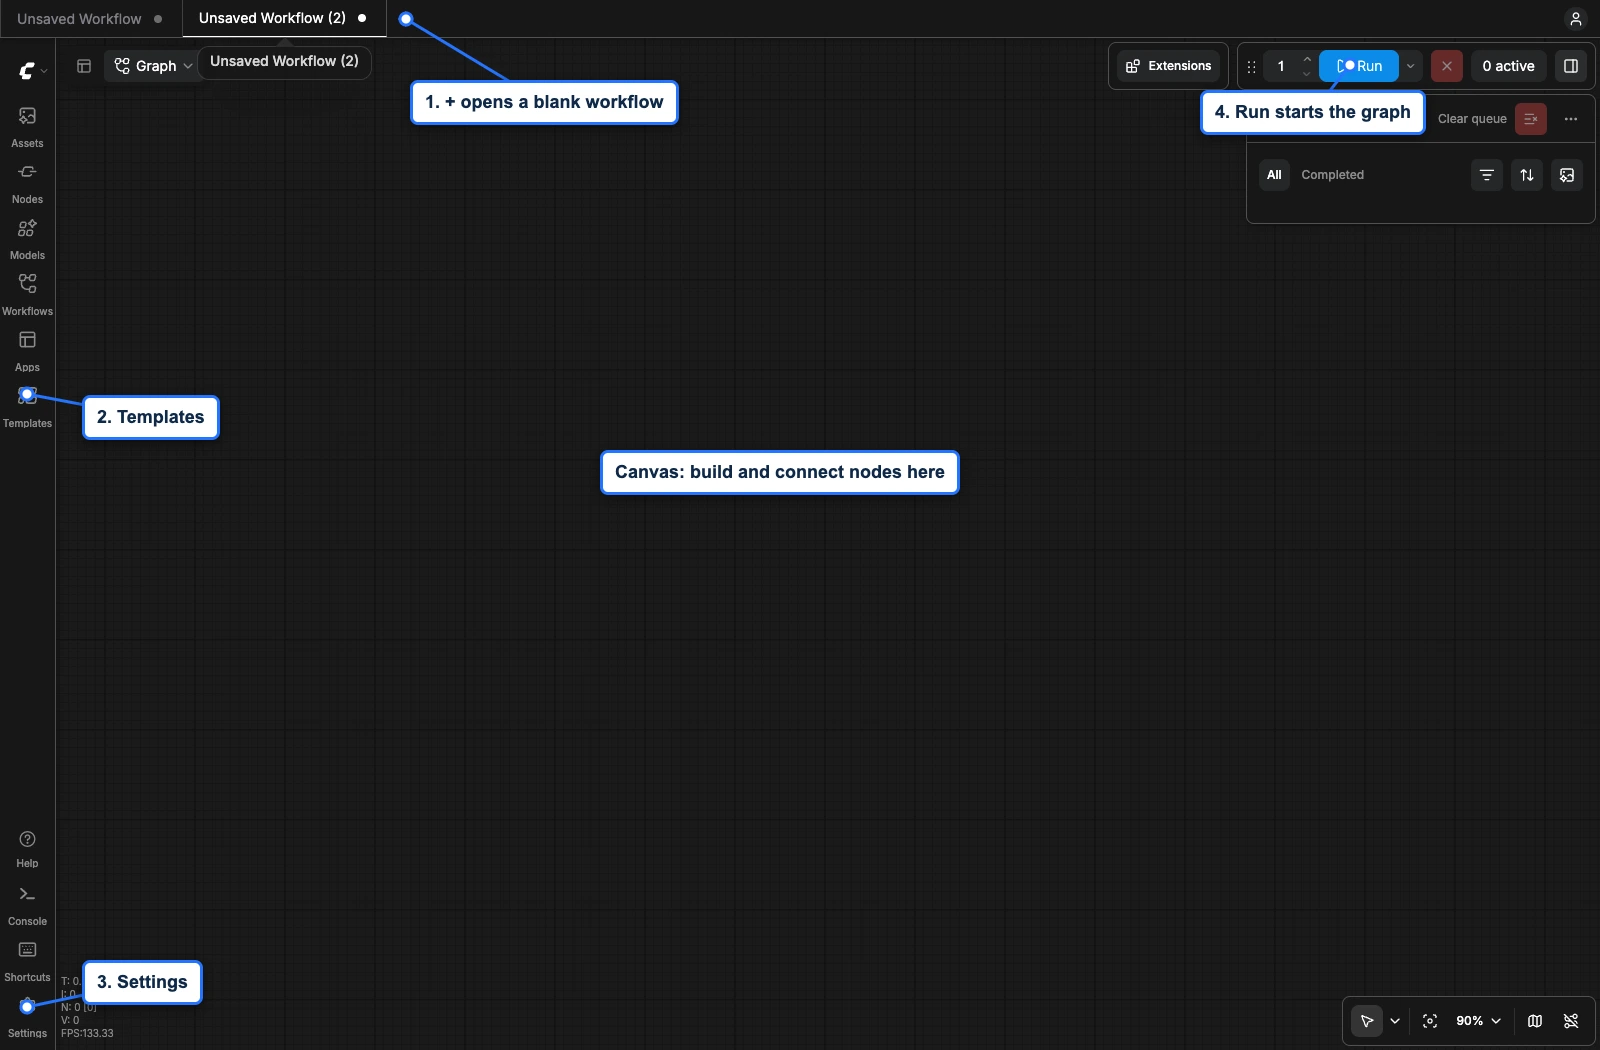
- Let setup finish, then launch ComfyUI. You should see the canvas where nodes are connected.
For a computer or environment that needs another installation method, follow the official manual installation guide. A default manual server opens at http://127.0.0.1:8188; Desktop presents the interface in its application.
Install the BytePlus pack
Section titled “Install the BytePlus pack”Open the ComfyUI menu at the top left of the workspace: click the ComfyUI logo beside the small down arrow, just left of Graph. Choose Extensions to open Nodes Manager. You can also press Extensions in the top toolbar, near Run.
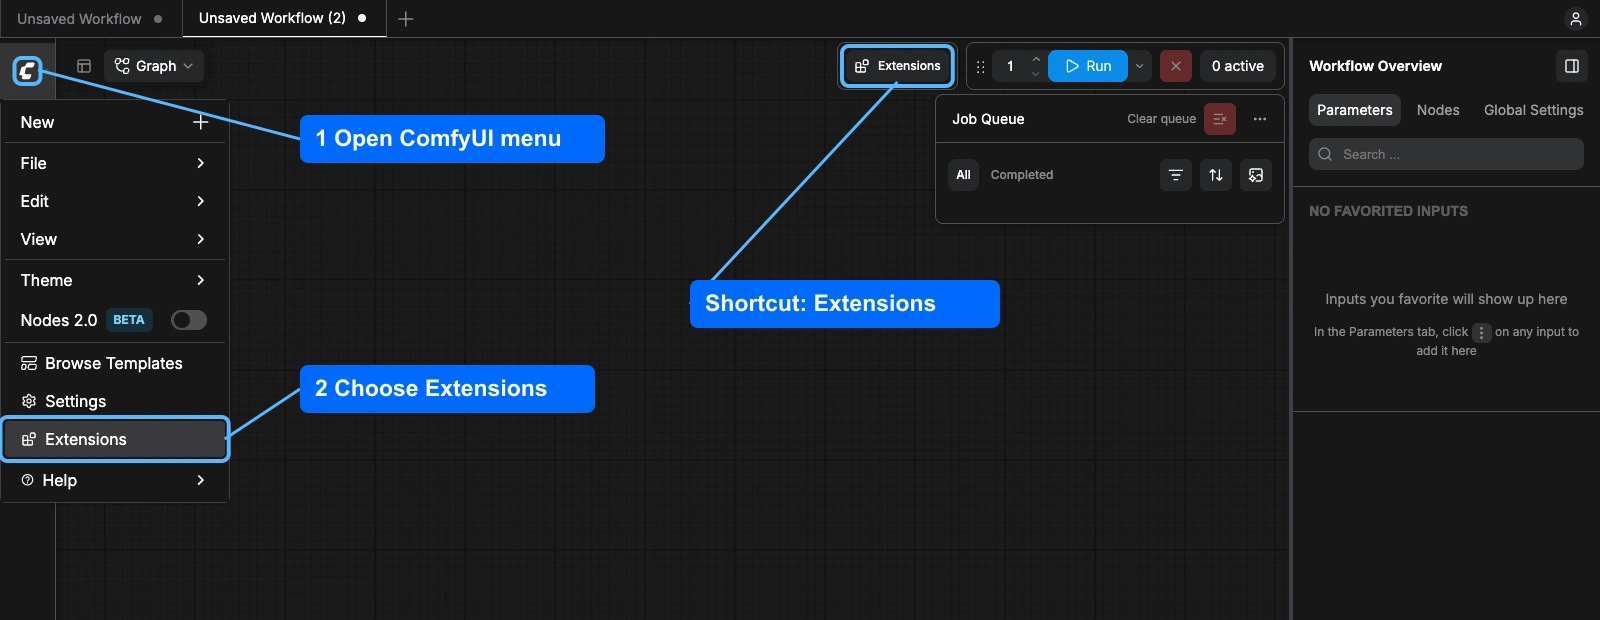
In older layouts with a Manager button, open ComfyUI-Manager > Custom Nodes Manager instead.

- In Nodes Manager, keep Node Pack selected in the dropdown. Click the search field beside it and search for BytePlus ModelArk. Check that the package is ComfyUI-BytePlus-ModelArk from BytePlus.
- Press Install and wait for the package and its requirements to finish installing.
- Restart ComfyUI. In Desktop, close and reopen the application. For a manual server, stop and restart the server process, then reload the browser tab. Reloading a tab alone does not load a newly installed Python node pack.
If Manager is unavailable or the pack is not listed, use the pack installation guide for the Comfy CLI or manual installation method.
Find your course tools
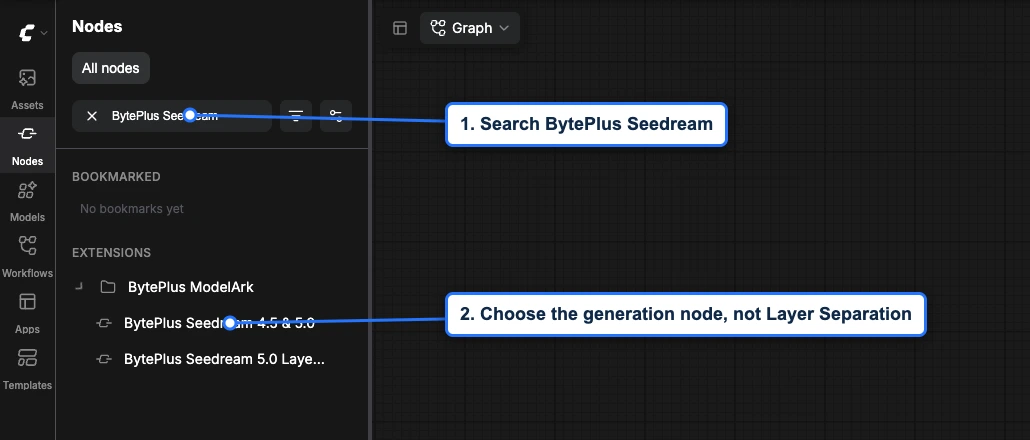
Section titled “Find your course tools”Open Nodes in the left sidebar and search for BytePlus Seedream. Look under BytePlus ModelArk for the generation node, not Layer Separation. Its title may include model-version numbers.
The Seedream and Image to Draft to 1080p templates are included when you install the pack. Open Templates in the left sidebar, look under ComfyUI-BytePlus-ModelArk, and open Seedream. For a manual installation, the group may use your installation folder’s name. Do not choose a core ByteDance partner template; those use a different account connection.
- Template
- Seedream, in the ComfyUI template browser under BytePlus
- BytePlus nodes
- Seedream 4.5 & 5.0
- Keys needed
- ModelArk API key
- Also uses
- Load Image, Save Image (built into ComfyUI)
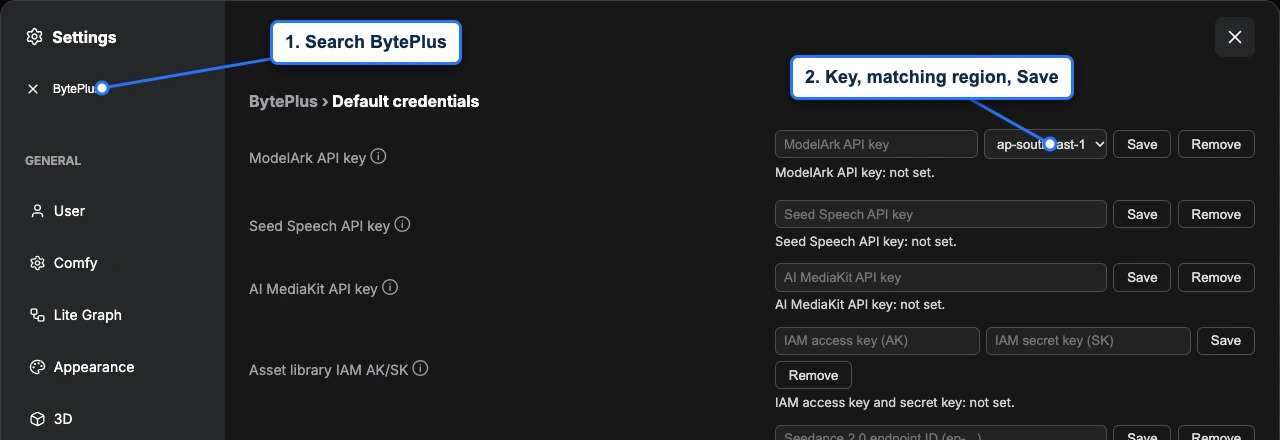
Open Settings and search for BytePlus. Find Default credentials and its ModelArk API key row. Leave it empty for now; you configure it in Module 2.
Practice
Section titled “Practice”Find the Seedream node, open the Seedream template, and locate the ModelArk key row. Do not run generation yet.
Completion check
Section titled “Completion check”- ComfyUI opens and shows its canvas.
- You can find BytePlus Seedream in node search.
- The course’s Seedream template opens with BytePlus nodes.
- Settings includes the ModelArk API key row.
Next lesson
Section titled “Next lesson”Module 2: Set up your API key.
Return to the course overview.